
Related Articles



Windshield wipers are one of those car parts that we often ignore until they stop working properly. I believe good windshield wipers are much more important than many drivers realize because they directly affect visibility during rain, snow, dust, and even when the windshield gets dirty. When the rubber blades become worn, they can leave streaks, make noise, or fail to clear water properly.
The good thing is that replacing windshield wipers is one of the easiest car maintenance jobs you can do at home. You usually do not need special tools, advanced mechanical knowledge, or a lot of time. With the correct replacement blades and a little care, you can change them yourself in just a few minutes.
In this guide, I will explain how to replace windshield wipers on your car, how to choose the correct wiper blades, how to remove the old ones, and how to install the new ones safely.
Why Windshield Wipers Matter
The main job of windshield wipers is to keep your windshield clear so you can see the road properly. During rain, water can quickly cover the glass and make it difficult to see traffic, road markings, pedestrians, and other vehicles.
In my opinion, windshield wipers should be treated as an important safety component rather than just another inexpensive car accessory. Even if your wipers still move across the glass, worn rubber can reduce their effectiveness.
Old wipers may leave water behind instead of removing it. They can also create streaks, squeaking sounds, or areas that remain wet. These problems become especially noticeable when driving at night or during heavy rain.
When Should You Replace Windshield Wipers?
There is no single replacement schedule that works for every vehicle. Wiper blades are affected by weather, sunlight, dust, temperature, and how often they are used.
A common sign that your wipers need replacement is streaking. If the blade moves across the windshield but leaves several lines of water behind, the rubber may have become worn.
Another sign is skipping. This happens when the blade does not stay in contact with the windshield and jumps across the glass while moving.
You may also hear squeaking or rubbing noises. A small amount of noise can happen for different reasons, but persistent noise can indicate that the rubber is damaged or hardened.
I also recommend checking the rubber itself. If you see cracks, tears, splits, or pieces missing from the blade, it is time to replace it.
Choose the Correct Replacement Wipers
Before removing your old windshield wipers, make sure you have the correct replacement blades. Wiper blades come in different lengths and attachment styles, so buying the wrong one can create unnecessary problems.
You can find the correct wiper size in your vehicle owner’s manual. Many automotive stores also have vehicle lookup systems where you enter your car’s make, model, and year.
You can also measure the existing blades, but I prefer checking the vehicle information because some cars use different sizes for the driver side and passenger side.
Do not assume both front wipers are the same size. Some vehicles use a longer blade on the driver’s side and a shorter blade on the passenger side.
It is also important to check the connector type. Common designs include hook style connections, push button connections, and several other fitting systems. Your new wiper should be compatible with your car’s wiper arm.
What You Need Before Starting
Replacing windshield wipers normally requires very little equipment. You mainly need the new replacement wiper blades and a clean place to work.
I recommend keeping a soft cloth nearby. You can use it to clean the windshield and protect the glass if necessary.
Park your car on a flat surface and turn the engine off. Make sure the wipers are in their normal resting position before you begin.
It is also a good idea to read the instructions supplied with the replacement blades. Different designs can have slightly different installation methods.
Step One: Lift the Wiper Arm
Start with one windshield wiper at a time. Carefully lift the wiper arm away from the windshield.
Do not force it if it feels difficult to move. Some modern vehicles have special wiper positions or designs that require extra care.
Once the arm is raised, hold it securely. The important thing to remember is that the metal wiper arm is spring loaded. If it suddenly falls onto the windshield, it can cause damage to the glass.
For this reason, never leave the raised wiper arm unattended.
Step Two: Remove the Old Wiper Blade
Look closely at the connection between the wiper blade and the wiper arm. You should see a small clip, button, tab, or locking mechanism depending on your vehicle.
Press or release the locking mechanism according to the design of your wiper. Then slide the old blade away from the arm.
Take your time during this step. If the blade does not move easily, check the connection again instead of pulling aggressively.
Once the old blade is removed, place it somewhere safe. You can compare it with the new blade to make sure the length and connector look correct.
Step Three: Clean the Wiper Arm
With the old blade removed, this is a good opportunity to inspect the wiper arm.
Check for obvious damage, rust, or loose parts. You can also wipe the arm with a clean cloth to remove dust and dirt.
I recommend paying special attention to the windshield because dirt and debris can affect the performance of the new blade.
Do not place the metal wiper arm directly against the windshield while working. If you need to lower it temporarily, use a soft cloth between the arm and the glass.
Step Four: Install the New Wiper Blade
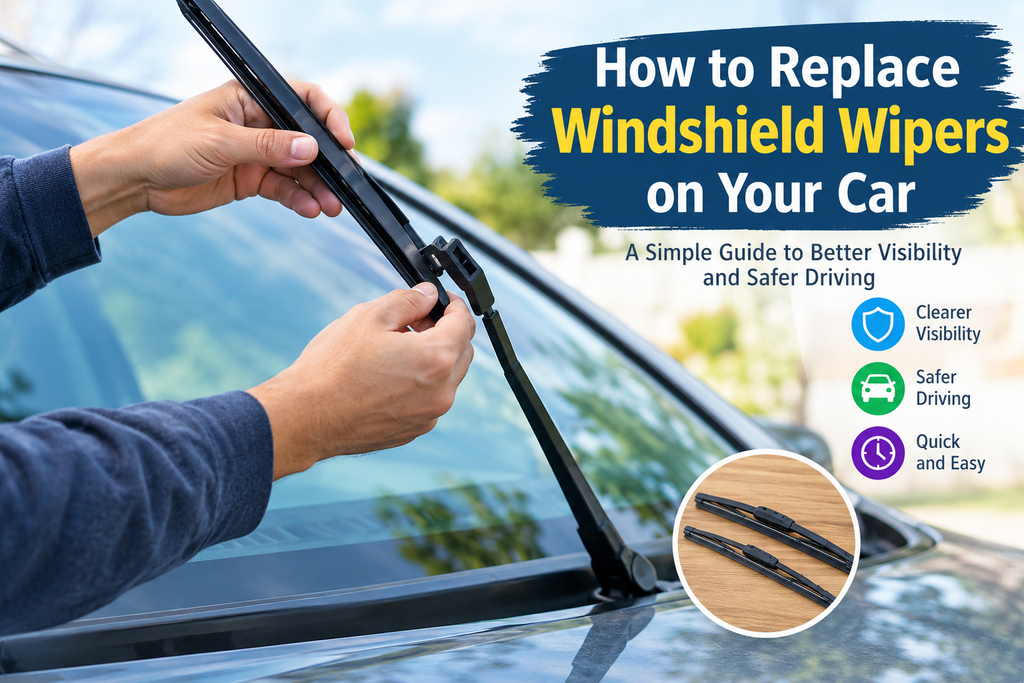
Take your new wiper blade and position its connector with the end of the wiper arm.
Slide or push the blade into place according to the connector design. You should normally hear or feel a click when the blade locks into position.
Do not assume it is secure just because it looks connected. Gently pull the blade to make sure it is properly locked.
A loose wiper blade can come off while driving, which can leave you with poor visibility during rain.
Step Five: Carefully Lower the Wiper Arm
Once the new blade is installed, carefully lower the wiper arm back onto the windshield.
Do not simply release it. The spring pressure can make the arm hit the glass.
Lower it slowly and gently until the blade rests naturally against the windshield.
Repeat the same process for the other front wiper.
Check the Rear Wiper
If your vehicle has a rear windshield wiper, do not forget about it. Rear wipers are replaced using a similar basic process, although the blade design and attachment system can be different.
Check the rear blade for the same warning signs, including streaking, cracking, skipping, and poor water removal.
Because rear visibility is also important, I believe the rear wiper deserves the same attention as the front wipers.
Test Your New Windshield Wipers
After installing the new blades, test them before driving in bad weather.
Spray windshield washer fluid onto the glass and turn the wipers on. Watch how they move across the windshield.
The blade should move smoothly and maintain contact with the glass. It should clear water without leaving large streaks or dry areas.
If the wiper makes unusual noises, check the installation again. Make sure the blade is correctly attached and sitting properly against the windshield.
Testing the wipers at home is much better than discovering a problem during a heavy rainstorm.
Common Mistakes to Avoid
One common mistake is buying the wrong size. Always confirm the correct blade size and connector for your vehicle.
Another mistake is allowing the metal wiper arm to fall onto the windshield. Even a short fall can damage the glass.
Some people also forget to remove protective packaging from a new blade before installation. Check the replacement blade carefully and follow the manufacturer’s instructions.
Do not use damaged or low quality blades simply because they are cheaper. A windshield wiper is relatively inexpensive compared with the importance of maintaining clear visibility.
Another mistake is ignoring the windshield itself. Even the best new wipers may perform poorly if the glass is covered with heavy dirt, oil, or other contamination.
How to Make Your New Wipers Last Longer
Taking care of your windshield wipers can help them last longer. Keep the windshield clean and avoid running dry wipers across dusty glass whenever possible.
If your car has been sitting outside for a long time, especially in hot weather, clean the windshield before using the wipers.
You can also inspect the rubber occasionally for cracks or damage.
In my experience, simple maintenance can make a noticeable difference. Wipers do not require complicated care, but keeping the windshield clean and avoiding unnecessary use on dry glass can help protect the blades.
Final Thoughts
Learning how to replace windshield wipers on your car is a simple skill that every driver can benefit from. The process usually takes only a few minutes, but properly installed wipers can make a big difference when rain or bad weather affects visibility.
The key steps are choosing the correct replacement blades, removing the old blades carefully, securing the new blades properly, and testing them before you drive.
I personally think this is one of the easiest maintenance tasks to learn at home. You do not need to be an experienced mechanic to replace windshield wipers. With a little patience and attention, you can complete the job safely and keep your windshield ready for the next rainy day.
Good visibility is an important part of safe driving, and something as simple as a fresh set of windshield wipers can help you maintain it.