Related Articles


Checking your engine oil is one of the easiest ways to take care of your car. You do not need to be a professional mechanic or have expensive tools to do it. In my experience, a few minutes spent checking the oil regularly can help you notice problems before they become expensive repairs.
Engine oil plays a very important role inside your engine. It lubricates moving parts, helps control temperature, reduces friction, and carries away small particles produced during normal engine operation. When the oil level becomes too low or the oil condition becomes poor, the engine may not work as efficiently and could eventually suffer serious damage.
The good thing is that checking engine oil is a simple process. In this guide, I will explain how to check your engine oil correctly, what the oil level should look like, what different oil colors can mean, and how often you should perform an engine oil check.
Why Checking Engine Oil Is Important
The engine contains many moving metal components that work together at high temperatures and speeds. Engine oil creates a protective layer between these components and helps them move smoothly.
If the oil level is too low, there may not be enough lubrication for important engine parts. This can increase friction and heat. In serious cases, low oil levels can contribute to major engine damage.
I personally believe that checking engine oil should become part of your basic car maintenance routine. It takes only a few minutes and can give you useful information about the condition of your engine.
Regular oil checks can also help you identify oil leaks. If you notice that the oil level keeps dropping between oil changes, your vehicle may have a leak or the engine may be consuming oil.
What You Need Before Checking Engine Oil
You do not need much equipment to check engine oil. Usually, all you need is a clean cloth or paper towel and your vehicle’s engine oil dipstick.
Make sure your car is parked on a level surface. Checking the oil on a slope can give you an inaccurate reading because the oil may not be evenly distributed inside the oil pan.
It is also a good idea to check your owner’s manual. Some modern vehicles have different procedures for checking oil, and some cars do not use a traditional dipstick at all. Certain vehicles display the oil level electronically through the dashboard.
Step 1: Park Your Car on a Level Surface
The first step is to park your vehicle somewhere flat and stable. Turn off the engine and engage the parking brake.
A level surface is important because the engine oil needs time to settle in the oil pan. If your car is parked at an angle, the reading on the dipstick may not accurately represent the actual oil level.
If you have just driven the car, allow the engine to cool for several minutes before checking the oil. Many manufacturers recommend checking the oil when the engine is off and the oil has had enough time to drain back into the oil pan.
Always follow the instructions in your vehicle owner’s manual because the recommended procedure can vary between vehicles.
Step 2: Open the Hood
Once the vehicle is safely parked, open the hood and secure it properly.
Look for the engine oil dipstick. On many vehicles, it has a small colored handle that makes it easy to identify. The handle may be yellow, orange, or another noticeable color.
If you cannot find the dipstick, check your owner’s manual rather than pulling out random components. Some modern engines have electronic oil level monitoring systems instead of a traditional dipstick.
Step 3: Remove the Oil Dipstick
Once you locate the dipstick, carefully pull it out of its tube.
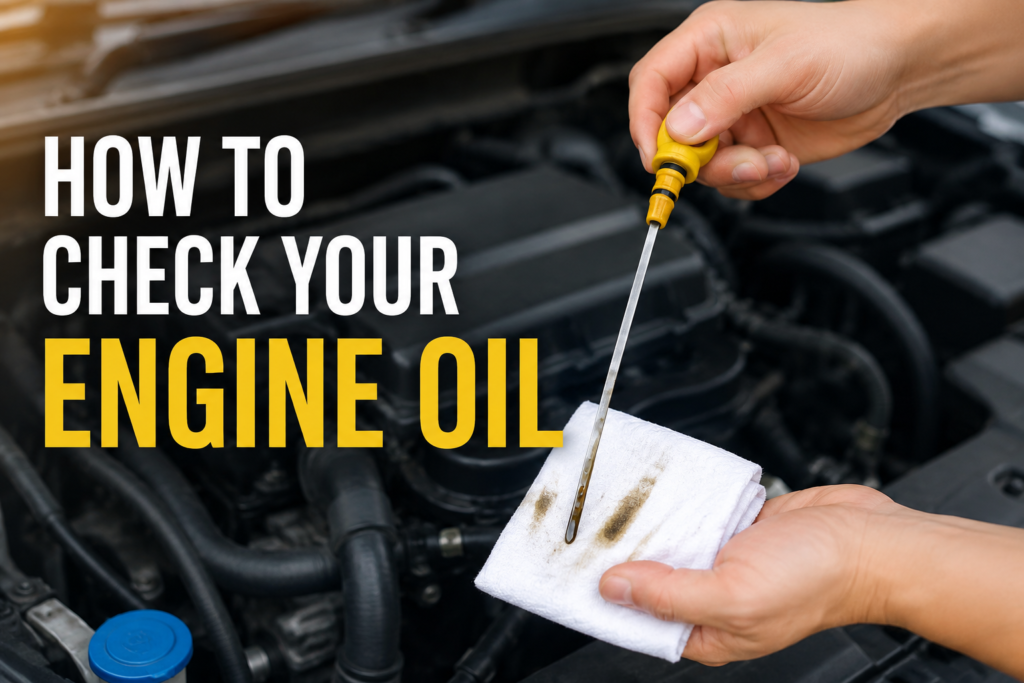
The end of the dipstick will normally have markings that indicate the minimum and maximum oil levels. These markings may be labeled MIN and MAX, LOW and FULL, or represented by small lines or dots.
Take a clean cloth or paper towel and wipe the entire end of the dipstick.
This first reading is not normally the one you use to determine the exact oil level because oil can spread along the dipstick while it is inside the tube.
Step 4: Insert the Dipstick Again
After wiping the dipstick clean, insert it completely back into the dipstick tube.
Make sure it goes all the way in. Once it is fully inserted, remove it again carefully.
Now look at the end of the dipstick. You should see a clear oil mark showing how much oil is present in the engine.
The oil should normally be somewhere between the minimum and maximum markings.
Step 5: Read the Oil Level
This is the most important part of checking your engine oil.
If the oil level is between the minimum and maximum marks, the level is generally within the acceptable range. If it is close to the minimum mark, you may need to add oil depending on your vehicle manufacturer’s recommendations.
If the oil level is below the minimum mark, do not ignore it. Running an engine with insufficient oil can increase the risk of serious damage.
On the other hand, adding too much oil is also not a good idea. Overfilling the engine can create problems and may cause oil to become aerated or reach areas where it should not be.
If you need to add oil, use the exact oil specification recommended by your vehicle manufacturer.
What Should Healthy Engine Oil Look Like?
Engine oil does not always stay the same color after being used. Fresh oil is usually clear amber or golden in appearance, depending on the type of oil.
As the oil circulates through the engine, it collects contaminants and can become darker. Dark oil does not automatically mean that the engine has a problem.
What matters is the overall condition of the oil.
If the oil looks unusually thick, contaminated, or contains visible particles, it may be worth having the vehicle inspected. Milky or creamy oil can also be a warning sign in some situations because it may indicate that coolant or moisture has mixed with the oil.
If you notice anything unusual, I recommend getting professional advice instead of trying to diagnose the entire problem from the dipstick alone.
How Often Should You Check Engine Oil?
There is no single schedule that works for every vehicle, but checking the engine oil regularly is a good habit.
For a car that is driven frequently, checking the oil once every few weeks can be a simple routine. It is also sensible to check it before a long road trip.
Older vehicles or vehicles that are known to consume oil may need more frequent checks.
I personally prefer checking the oil regularly rather than waiting for a warning light. A dashboard warning light is important, but it should not be your only method of monitoring engine oil.
Signs Your Car May Be Low on Oil
Sometimes your vehicle can provide clues that the oil level or oil condition needs attention.
Common warning signs can include an engine oil warning light, unusual engine noises, increased engine temperature, burning oil smells, or visible oil underneath the vehicle.
However, these symptoms should not be ignored or used as a replacement for checking the oil level.
If the oil warning light comes on while driving, take it seriously. Depending on the vehicle and the warning system, continuing to drive could result in engine damage.
How to Add Engine Oil Correctly
If the oil level is low and your vehicle requires additional oil, first confirm the correct oil type and specification from the owner’s manual.
Locate the engine oil filler cap. It is usually found on the top of the engine and may have an oil symbol.
Remove the cap and add a small amount of oil at a time. Do not immediately pour a large quantity into the engine.
After adding a small amount, wait briefly and check the dipstick again. Continue carefully until the oil reaches the appropriate level.
Avoid filling beyond the maximum marking.
It is better to add oil gradually because removing excess oil can be inconvenient.
Common Mistakes When Checking Engine Oil
One common mistake is checking the oil immediately after switching off a hot engine. Depending on the vehicle, some oil may still be circulating through the engine, which can affect the reading.
Another mistake is checking the oil on an uneven surface. Always try to park on level ground.
Some people also wipe the dipstick and forget to insert it fully before taking the second reading. This can produce an inaccurate result.
Another mistake is using the wrong oil. Modern engines can have specific oil viscosity and performance requirements, so always check your owner’s manual before buying engine oil.
Finally, avoid assuming that adding more oil is always better. Too much engine oil can also cause problems.
Checking Engine Oil Can Save You Money
One of the main reasons I recommend learning how to check engine oil is that it gives you an early warning about potential problems.
Suppose you check the oil today and find that it is at the correct level. A few weeks later, you check it again and notice that the level has dropped significantly. That change is useful information.
It could be normal oil consumption depending on the vehicle, but it could also indicate a leak or another mechanical issue.
Finding these problems early can potentially save you from expensive repairs later.
Final Thoughts
Learning how to check your engine oil is a simple but valuable part of car maintenance. You only need a clean cloth, a few minutes, and some basic knowledge about your vehicle.
The basic process is straightforward. Park on a level surface, turn off the engine, locate the dipstick, wipe it clean, insert it again, and check the oil level against the markings.
Do not forget to pay attention to the condition of the oil as well. Unusual oil appearance, a rapidly falling oil level, visible leaks, or warning lights should not be ignored.
In my opinion, regular engine oil checks are one of the easiest habits a car owner can develop. They help you understand what is happening under the hood and can give you an opportunity to address small problems before they become much bigger ones.
If you are unsure about the correct oil type, oil level, or condition of your engine, always check the vehicle manufacturer’s recommendations or consult a qualified mechanic. A few minutes of careful maintenance can go a long way toward keeping your engine running smoothly.